Overview
GitHub has really opened the doors for collaboration across the wider software development community. If you are already using GitHub then it makes sense to make the most of the GitHub ecosystem and use of all of it’s available features, including GitHub Actions; a powerful workflow engine that enables developers to automate repetitive tasks.
In this post I’ll show you how you can deploy an Azure Function using a GitHub Actions workflows, and by the end of this guide, you’ll have a fully working automated deployment pipeline setup.
Please note that this guide assumes that you are already familiar with using Azure Functions and using GitHub for basic source control management.

High Level Approach
There are a few steps involved in configuring our automated GitHub Actions deployment pipeline, they are as follows:
- First, we must create a new Azure AD App Registration. This will enable our GitHub Action deployment pipeline to authenticate with Azure (using App Registration credentials).
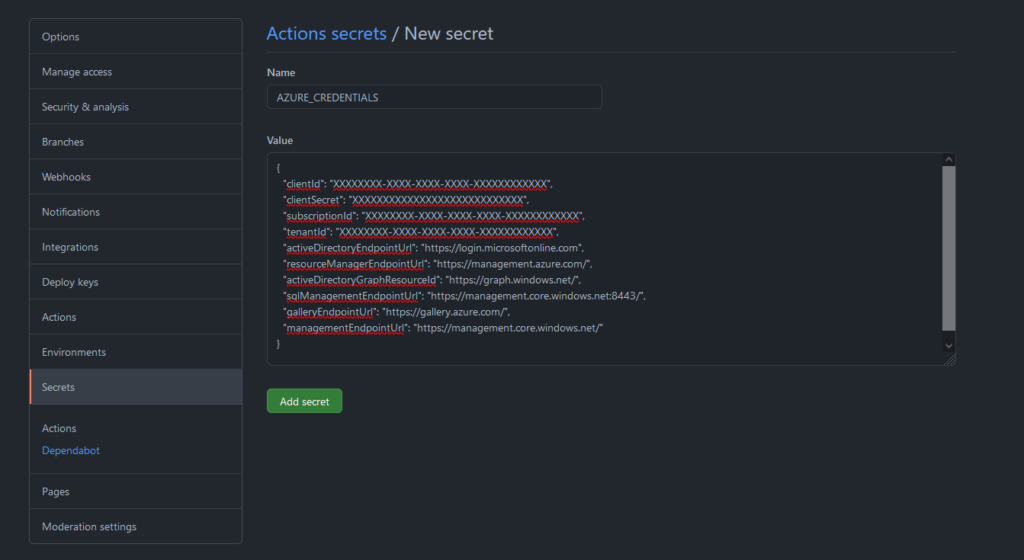
- Then, we’ll create a new Secret in our GitHub repo containing the Azure AD App Registration credentials.
- Then, we’ll create an Azure Function App ARM template which will create the Function App resource in Azure.
- And finally, we’ll create a GitHub Actions Workflow file to execute the ARM template and also deploy our Azure Function code.
Create the Azure Function
For the purposes of this tutorial, I’ve created a basic HTTP Azure Function (C#) that we’ll be deploying to Azure.
You can find the source code in the below GitHub repository:
https://github.com/sbartholomeusz/git-actions-az-deploy-demo

Create Azure AD App Registration
Our GitHub Actions workflow will first need to authenticate with Azure before it can begin deploying our code, therefore we must generate a new Azure AD App Registration and then fetch the credentials for it.
So lets head over to the Azure Portal and run the following command in the Azure Bash Cloud Shell to register a new Azure AD application. Once completed your new App Registration will be visible under AZURE ACTIVE DIRECTORY > APP REGISTRATIONS.

az ad sp create-for-rbac --name "myApp" --role contributor \
                         --scopes /subscriptions/{subscription-id}/resourceGroups/{resource-group} \
                         --sdk-auth
At this point, you’ll receive a JSON response containing the secret credentials. Keep this some place secure as you won’t be able to retrieve this later. Note: This will be required in the next step.
{
  "clientId": "XXXXXXXX-XXXX-XXXX-XXXX-XXXXXXXXXXXX",
  "clientSecret": "XXXXXXXXXXXXXXXXXXXXXXXXXXXX",
  "subscriptionId": "XXXXXXXX-XXXX-XXXX-XXXX-XXXXXXXXXXXX",
  "tenantId": "XXXXXXXX-XXXX-XXXX-XXXX-XXXXXXXXXXXX",
  "activeDirectoryEndpointUrl": "https://login.microsoftonline.com",
  "resourceManagerEndpointUrl": "https://management.azure.com/",
  "activeDirectoryGraphResourceId": "https://graph.windows.net/",
  "sqlManagementEndpointUrl": "https://management.core.windows.net:8443/",
  "galleryEndpointUrl": "https://gallery.azure.com/",
  "managementEndpointUrl": "https://management.core.windows.net/"
}
Create Github Repo Secret
Now lets store these credentials in our GitHub repo. Head over to your GitHub repo (i.e. the same repo where your Azure Function code is stored) and create a ‘Secret’ containing the JSON response from the previous step.

Generate Azure Function App ARM Template
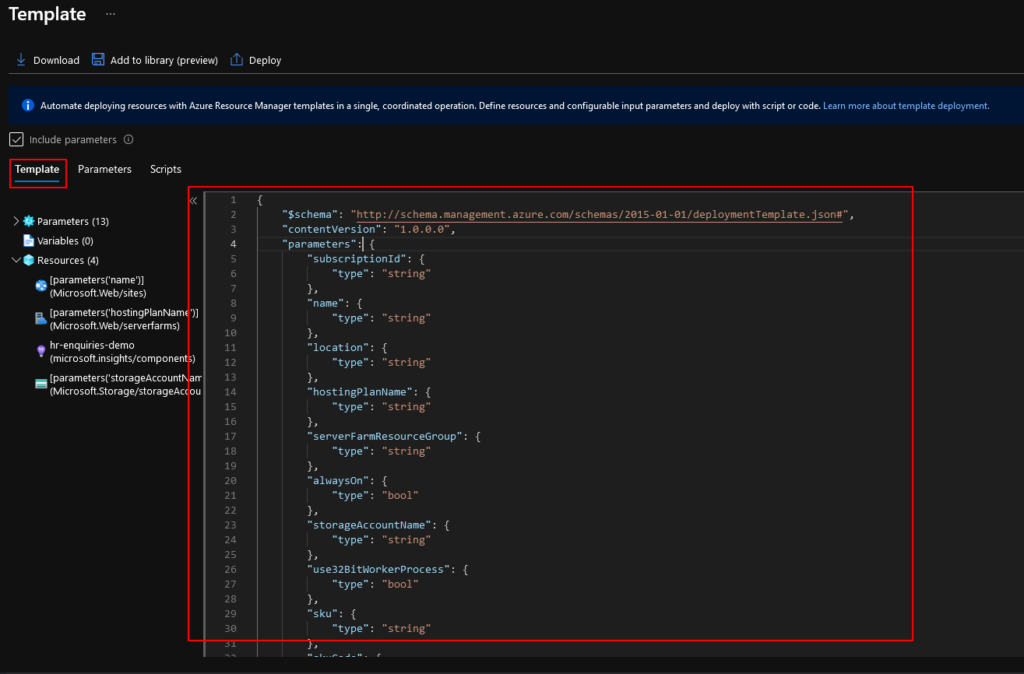
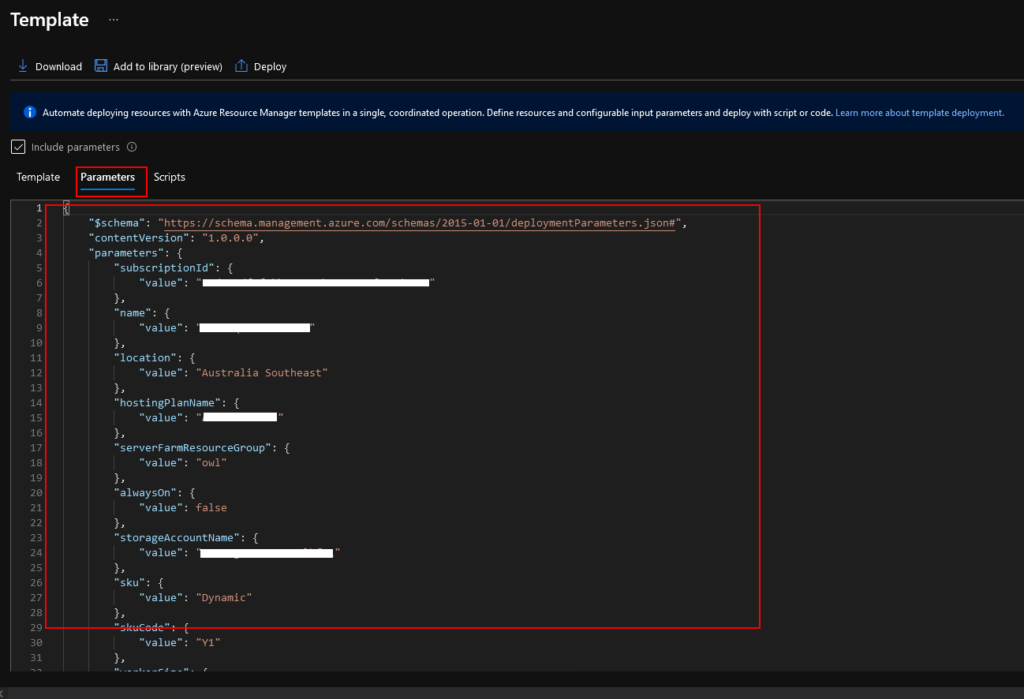
Now, we’ll generate an ARM template through the Azure Portal. This template will create an empty Azure Function App resource in Azure.
In the Azure Portal, create a new Function App resource. At the ‘Review + create’ screen, click ‘Download a template for automation’. This option will auto generate the ARM template for you (including the Template and Parameters file) which you’ll need to store in your GitHub code repository. We’ll be referencing this from our GitHub Actions workflow file later on.
For reference, in my GitHub repository I’ve created an empty Visual Studio project containing the ARM templates that I’ll be using:
https://github.com/sbartholomeusz/git-actions-az-deploy-demo/tree/master/src/GreetingDemo.AzArmTemplates


GitHub Actions 101
GitHub Actions workflows are defined using YAML files to define triggers, jobs and associated steps that need to be performed. These YAML files must be stored in your GitHub repo alongside your code in the following directory.
.github/workflows
Here’s a sample of what a YAML file looks like:
# Employee records
- tom:
    name: Tom Ato
    job: Manager
    skills:
      - public speaking
      - excel
      - drinking coffee
- caesar:
    name: Caesar Salad
    job: Developer
    skills:
      - typescript
      - angular
In case you are interested, you can find more information about GitHub Actions at the below link:
https://docs.github.com/en/actions/learn-github-actions/introduction-to-github-actions
Create Github Actions Workflow File
Now it’s time to roll up our sleeves and get down to business … specifically, we need to create our Github Actions workflow file which is where all the magic happens!
We will create a GitHub Actions *.yml workflow file that will perform the following high level steps:
- Create the empty Azure Function App resource using our ARM template
- Build and package the C# Azure Function code
- Deploy your code to the Azure Function App
Here is the full GitHub Actions YAML manifest file. It might look a bit scary at first, but don’t worry, we’ll walk through it step-by-step.
https://github.com/sbartholomeusz/git-actions-az-deploy-demo/blob/master/.github/workflows/deploy-to-azure.yml
name: azure-deploy

on:
  push:
	branches: [ master ]

env:
  DOTNET_VERSION: '3.1.x'
  AZURE_RESOURCE_GROUP_NAME: 'git-actions-deploy-func-demo'
  AZURE_FUNCTIONAPP_NAME: 'greetingservice'
  AZURE_FUNCTIONAPP_PACKAGE_PATH: '${{ github.workspace }}/src/GreetingDemo.Function'
  BUILD_OUTPUT_PATH: '${{ github.workspace }}/build-artifacts'
  BUILD_PACKAGE_NAME: 'az-func.zip'

defaults:
  run:
	shell: bash
This first section of the script specifies the following:
- Defines the triggers that will cause this workflow to fire. This particular workflow will execute when someone pushes a new commit to the ‘master’ branch of this repository.
- Then we define various environment variables. Note: You will need to update the following ones
- AZURE_RESOURCE_GROUP_NAME: Specifies the Resource Group where the Function App will reside.
- AZURE_FUNCTIONAPP_NAME: Specifies the name of the Function App Resource that will be created. This must match your ARM template.
- AZURE_FUNCTIONAPP_PACKAGE_PATH: Path to your Azure Function code.
- Finally, GitHub supports numerous command line shells. In our case, we will use the bash shell by default, unless otherwise specified within a given job.
jobs:
	deploy-az-infrastructure:
  	runs-on: ubuntu-latest
  	steps:

   	# Authentication
   	# Set up the following secrets in your repository: AZURE_CREDENTIALS
   	# For details see https://docs.microsoft.com/en-us/azure/developer/github/connect-from-azure
   	- name: 'Login to Azure'
     	uses: azure/login@v1
     	with:
       	creds: ${{ secrets.AZURE_CREDENTIALS }}

   	# Makes source code accessible via $github.workspace
   	- name: 'Checking out source code ...'
     	uses: actions/checkout@v2

   	# Deploy Azure function app
   	# Note: Using Azure CLI for deployment as it provides more verbose error messages
   	- name: 'Creating Azure Function App'
     	uses: azure/CLI@v1
     	with:
       	inlineScript: |
         	az deployment group create \
         	--name az-func-workflow-deploy \
         	--resource-group ${{ env.AZURE_RESOURCE_GROUP_NAME }} \
         	--template-file $GITHUB_WORKSPACE/src/GreetingDemo.AzArmTemplates/GreetingFunction/template.json \
         	--mode incremental \
         	--parameters $GITHUB_WORKSPACE/src/GreetingDemo.AzArmTemplates/GreetingFunction/parameters.json \
In the next section, we create a job named deploy-az-infrastructure which will execute our ARM template to create the Azure Function App resource.
Note: I personally prefer the use the Azure CLI over the pre-built azure/arm-deploy@v1 action because the CLI provides more useful information when troubleshooting failures, whereas the pre-built action can sometimes provides cryptic error messages.
	build-az-function:
  	needs: [deploy-az-infrastructure]
  	runs-on: ubuntu-latest
  	steps:

   	# Makes source code accessible via $github.workspace
   	- name: 'Checking out source code ...'
     	uses: actions/checkout@v2

   	- name: 'Setup .NET Environment'
     	uses: actions/setup-dotnet@v1
     	with:
       	dotnet-version: ${{ env.DOTNET_VERSION }}

   	- name: 'Build and package code'
     	shell: bash
     	run: |
       	publishfolder="${{ github.workspace }}/output"
       	mkdir $publishfolder
       	cd $publishfolder
       	dotnet publish ${{ env.AZURE_FUNCTIONAPP_PACKAGE_PATH }} --configuration Release --output .
       	mkdir ${{ env.BUILD_OUTPUT_PATH }}
       	zip -r ${{ env.BUILD_OUTPUT_PATH }}/${{ env.BUILD_PACKAGE_NAME }} .

   	# Upload the code artifact, this will be used later
   	- name: 'Package Azure Function release build'
     	uses: actions/upload-artifact@v2
     	with:
       	name: build_artifacts
       	path: ${{ env.BUILD_OUTPUT_PATH }}
       	if-no-files-found: error
The build-az-function job will then build the code, create a zip package and finally store the zip artefact for later use. This job will only be executed after the deploy-az-infrastructure job has finished running.
	deploy-az-function:
  	needs: [build-az-function]
  	runs-on: ubuntu-latest
  	steps:

   	# Makes source code accessible via $github.workspace
   	- name: 'Checking out source code ...'
     	uses: actions/checkout@v2

   	# Authentication
   	# Set up the following secrets in your repository: AZURE_CREDENTIALS
   	# For details see https://docs.microsoft.com/en-us/azure/developer/github/connect-from-azure
   	- name: 'Login to Azure'
     	uses: azure/login@v1
     	with:
       	creds: ${{ secrets.AZURE_CREDENTIALS }}
       	enable-AzPSSession: true

   	- name: 'Fetching Azure Functions Publishing Profile'
     	id: fncapp
     	uses: azure/powershell@v1
     	with:
       	inlineScript: |
           	$profile = ""
           	$profile = Get-AzWebAppPublishingProfile -ResourceGroupName $env:AZURE_RESOURCE_GROUP_NAME -Name $env:AZURE_FUNCTIONAPP_NAME
           	$profile = $profile.Replace("`r", "").Replace("`n", "")
           	Write-Output "::set-output name=pubprofile::$profile"
           	Remove-Variable profile
       	azPSVersion: "latest"

   	- name: 'Create output directory'
     	shell: bash
     	run: |
       	mkdir ${{ env.BUILD_OUTPUT_PATH }}

   	# Fetch published code
   	- name: 'Download Azure function release build'
     	uses: actions/download-artifact@v2
     	with:
       	name: build_artifacts
       	path: ${{ env.BUILD_OUTPUT_PATH }}

   	# Deploy Azure functions code
   	- name: 'Run Azure Functions Action'
     	uses: azure/functions-action@v1
     	with:
       	app-name: ${{ env.AZURE_FUNCTIONAPP_NAME }}
       	package: ${{ env.BUILD_OUTPUT_PATH }}/${{ env.BUILD_PACKAGE_NAME }}
       	publish-profile: ${{ steps.fncapp.outputs.pubprofile }}
The deploy-az-function workflow job does the following
- We first fetch the Publishing Profile for our Function App we created earlier. This is required later for the code deployment.
- Then we fetch the zip artefact we created earlier containing the published code.
- Finally, we deploy the code to the Azure Function App.
We have now successfully created our GitHub Actions workflow which will auto-magically deploy our Azure Function. The workflow will trigger when push a new commit to our GitHub code repository.
The full workflow file script can be found here:
https://github.com/sbartholomeusz/git-actions-az-deploy-demo/blob/master/.github/workflows/deploy-to-azure.yml

Once the GitHub Actions deployment workflow finishes running, our Azure Function will soon be accessible.

Well that’s it. We are all done…
Now it’s time to sit back, relax, crack open a beer and admire our wonderful work 🙂
Final Thoughts
With GitHub Actions, it’s now easier than ever to build out an extensive CI/CD pipeline. And best of all it’s free to get started!
I hope you’ve learnt a thing or two from this article. If you any thoughts or learnings that you would like to share, please feel free to post them in the comments below to help others out there.
The full code sample referenced in the above article can be found at the below GitHub repository:
https://github.com/sbartholomeusz/git-actions-az-deploy-demo
Happy coding!
- Solved: Filename too long for Git - 18th April 2025
- GitHub Actions Exam Study Guide - 14th February 2025
- Solved: Build Errors Not Showing in VS 2022 - 21st November 2024