In this article I’ll show you how you can configure you Synology NAS to use a VPN. In this case I’m using DSM 5.1.
Why use a VPN client?
A VPN client will help mask your activities online by tunneling your traffic through an intermediary proxy.
Why would you want to configure your Synology NAS to use a VPN … well lets just say this might especially be of interest to those using Synology Download Station ????
How do I set it up?
- Open the CONTROL PANEL
- Navigate to the NETWORK tab
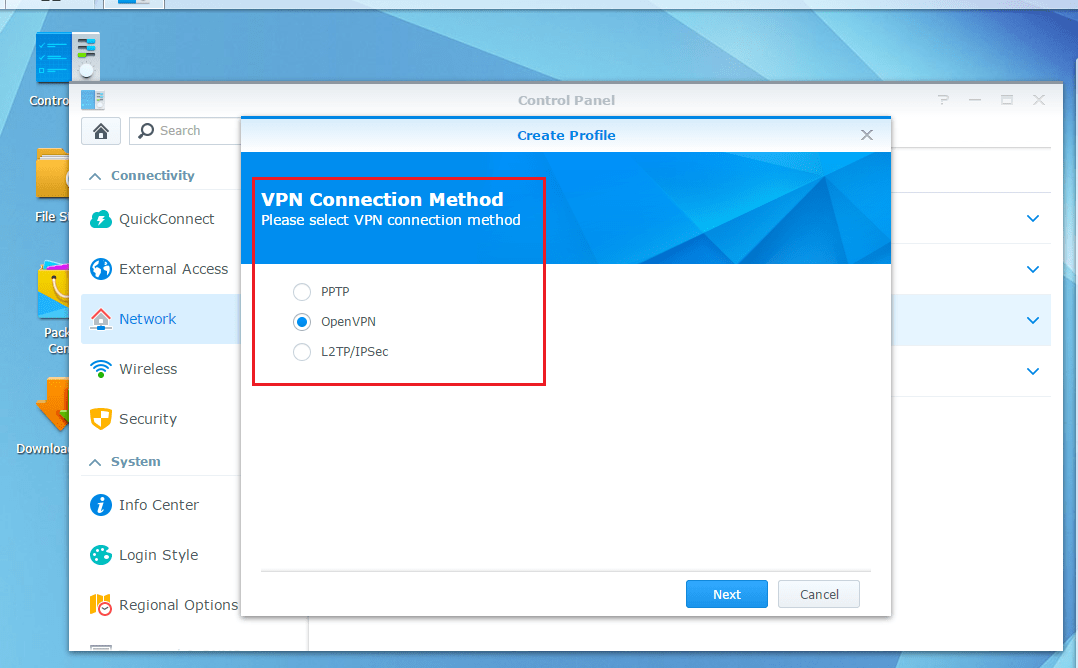
- Click the CREATE > CREATE VPN PROFILE button
- Choose the VPN connection method. It’s preferable to use OpenVPN as it’s the most secure, otherwise use LT2P/IPSEC if possible. For the purposes of this guide, I’m using OpenVPN.
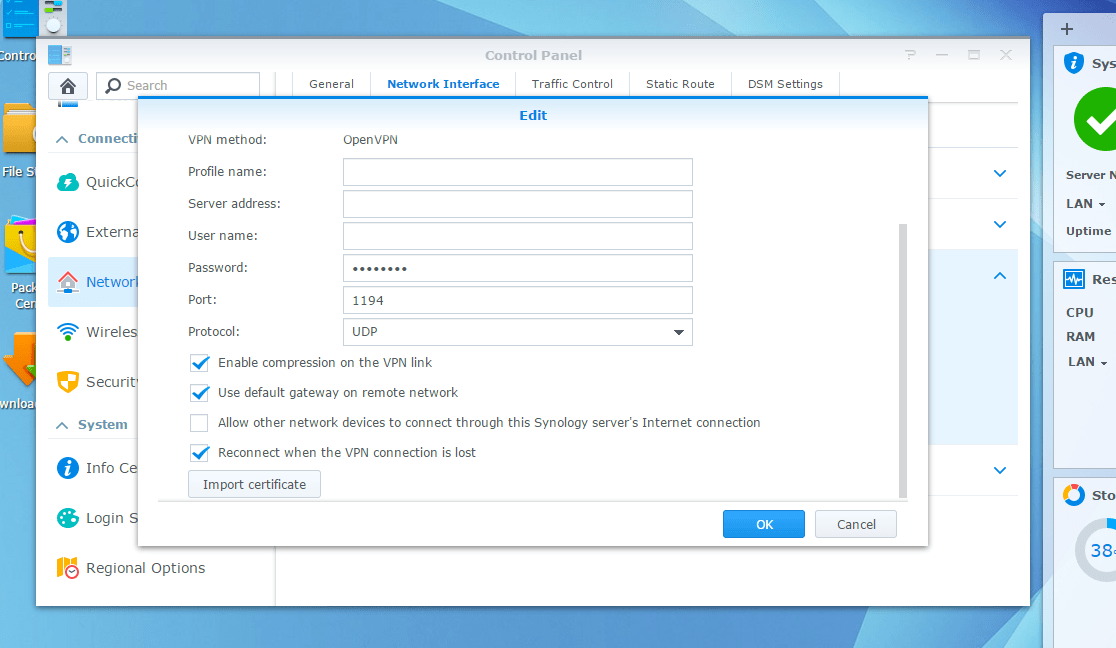
- Enter the VPN connection details and attach the security certificate (which should come from your VPN provider). Make sure you tick the “Use default gateway on remote network” option to ensure internet traffic is routed through the VPN.


Enable the VPN
Once you’ve create the VPN profile, you’ll need to enable it by clicking the CONNECT button in the NETWORK INTERFACE panel.
Verify
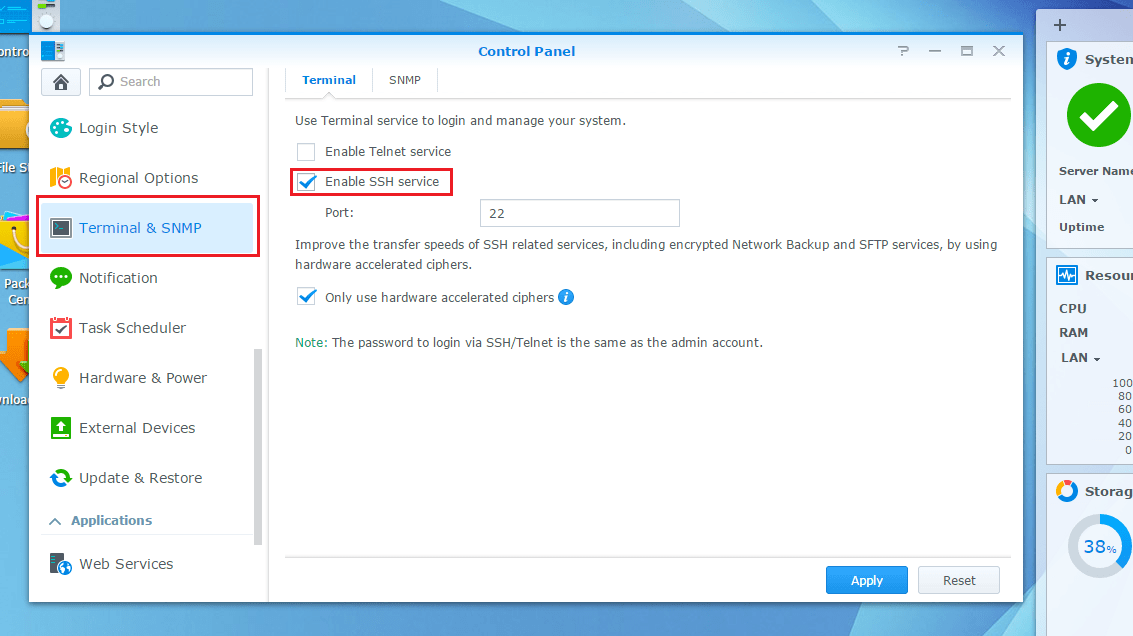
- Connect to the NAS via SSH. In this case I’m using Putty for this. If you haven’t already, you’ll need to enable SSH in the TERMINAL & SNMP tab within the CONTROL PANEL.

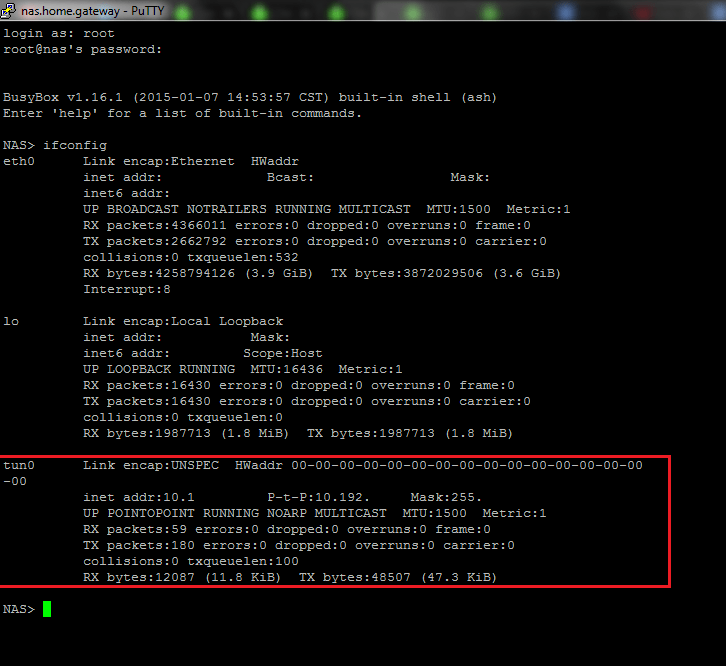
- Running the IFCONFIG command should show you whether the VPN tunnel has been established.

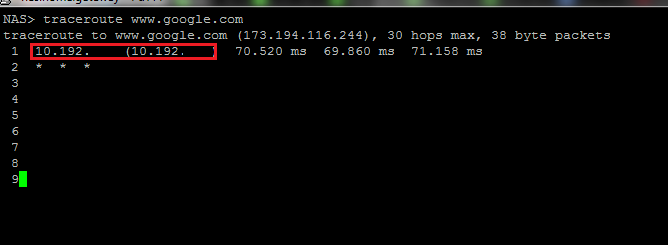
- Running command “traceroute www.google.com” should also show that the ping ICMP request is being routed through the VPN.

And that’s it, easy!

G’day, I’m a technical solutions consultant based in Perth, Australia that specialises in the Microsoft technology stack, including .NET, Dynamics 365, Azure and general web development etc.
This blog is my place to share my thoughts, helpful solutions and just random nerdy stuff.
This blog is my place to share my thoughts, helpful solutions and just random nerdy stuff.
Latest posts by Shane Bartholomeusz (see all)
- Solved: Filename too long for Git - 18th April 2025
- GitHub Actions Exam Study Guide - 14th February 2025
- Solved: Build Errors Not Showing in VS 2022 - 21st November 2024


Leave a Reply